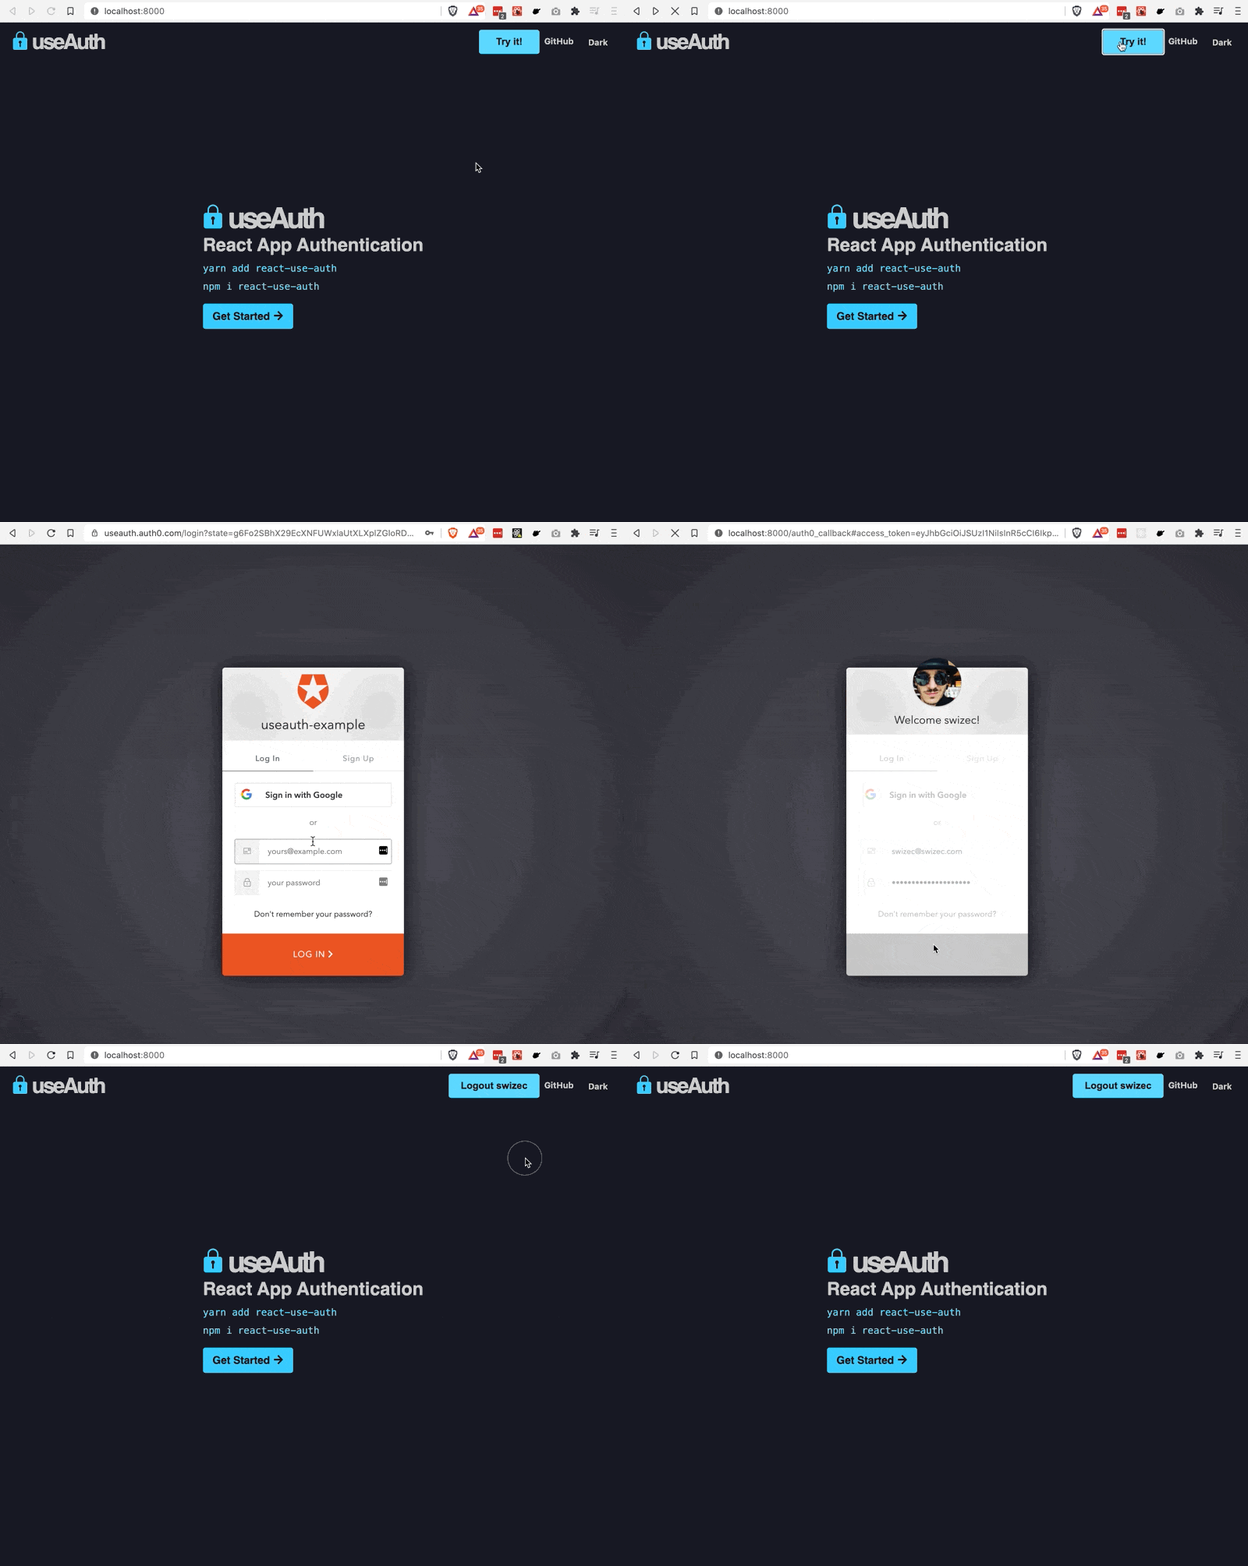
Use with Auth0
useAuth was originally created with Auth0 in mind. It uses the auth0-js library under the hood and supports all the same configuration.
example app 👉 examples/useauth-gatsby-auth0
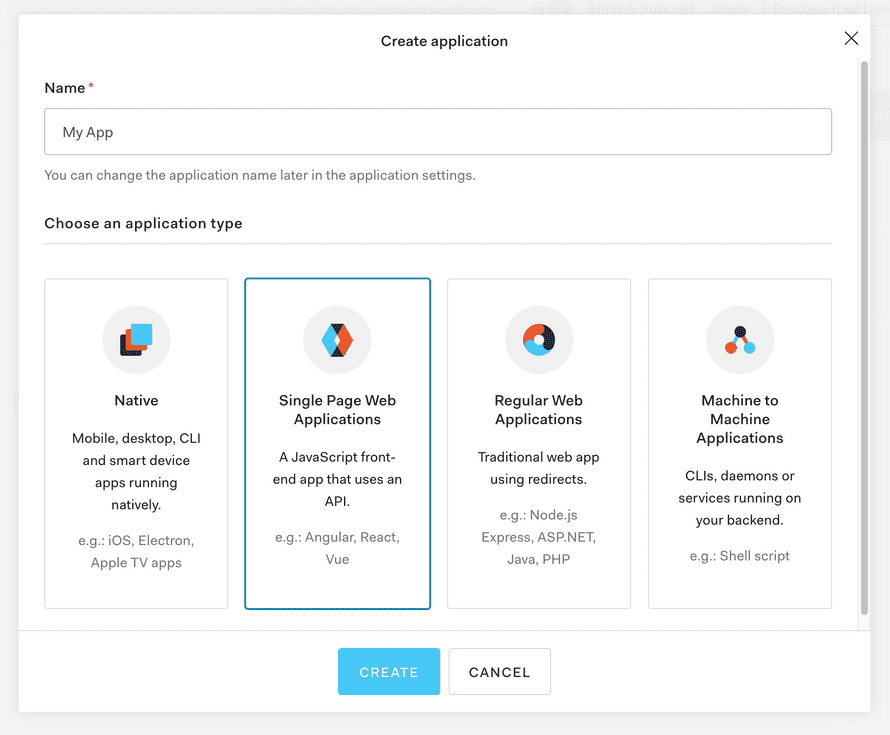
1. Create a new application on Auth0
Go to your Auth0 Dashboard, find the tenant you wish to use, and create a new Single Page Application.
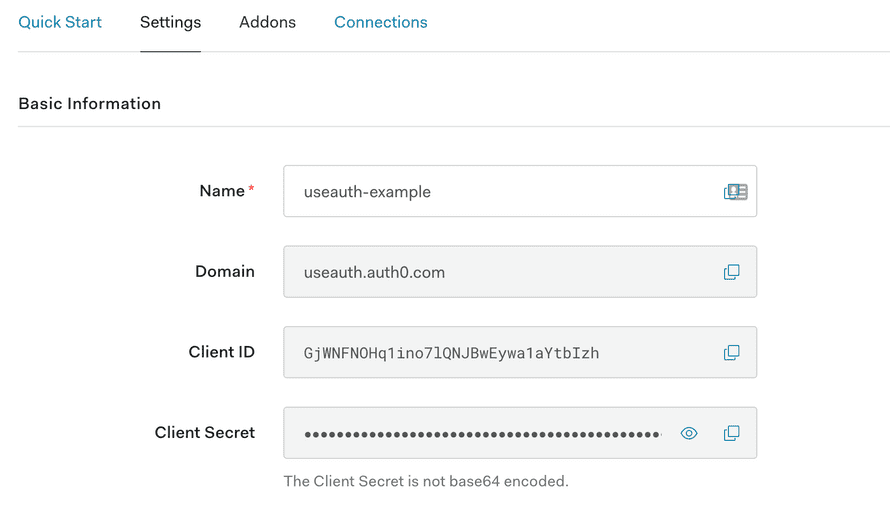
Once created, go to settings and find your Domain and ClientID. You'll need them to configure useAuth.
2. Configure your Auth0 app
Auth0 is strict about which websites can and can't initiate a login flow for your users. This ensures your users can't fall prey to hacking attempts and get their auth stolen.
Wouldn't want some other website to pretend they're you 😉
Scroll down in settings and configure:
- your allowed Callback URLs
- your allowed Logout URLs
- your allowed Web Origins
useAuth uses the <domain>/auth0_callback callback URL and the <domain>/ logout url by default. You can change this behavior, but make sure it matches your Auth0 config.
Here's what the useAuth.dev example site uses:
Note that localhost is added to enable local testing. ✌️
3. Install dependencies
Install both useAuth and auth0-js. We put providers in peer dependencies to reduce package sizes :)
yarn add react-use-auth auth0-js
or
npm install react-use-auth auth0-js
4. Configure useAuth
You can configure useAuth itself and the underlying Auth0 client in one go. Configuration with sane defaults needs just 2 params:
- your domain
- your clientID
With Gatsby
// gatsby-browser.jsimport { AuthConfig } from "react-use-auth";import { Auth0 } from "react-use-auth/auth0";import { navigate } from "gatsby";export const wrapPageElement = ({ element }) => (<><AuthConfigauthProvider={Auth0}navigate={navigate}params={{domain: "useauth.auth0.com",clientID: "GjWNFNOHqlino7lQNjBwEywalaYtbIzh"}}/>{element}</>);
With NextJS
// pages/_app.jsimport { AuthConfig } from "react-use-auth";import { Auth0 } from "react-use-auth/auth0";import { useRouter } from "next/router";function MyApp({ Component, pageProps }) {const router = useRouter();return (<><AuthConfigauthProvider={Auth0}navigate={(url) => router.push(url)}params={{domain: "useauth.auth0.com",clientID: "GjWNFNOHqlino7lQNjBwEywalaYtbIzh"}}/><Component {...pageProps} /></>);}
PS: domain and clientID in snippets are from the useAuth demo site and are shared intentionally so you can test. Replace with your own values
Default Auth0 params
By default useAuth's Auth0 client uses these params:
// callback domain is current window.location or localhost:8000const callbackDomain =typeof window !== "undefined"? `${window.location.protocol}//${window.location.host}`: "http://localhost:8000";// default paramsconst params = {domain,clientID,redirectUri: `${callbackDomain}/auth0_callback`,audience: `https://${callbackDomain}/api/v2/`,responseType: "token id_token",scope: "openid profile email"};
domain and clientID come from your props.
redirectUri is set to use the auth0_callback on the current domain. Auth0 redirects here after users login so you can set cookies and stuff. useAuth handles this for you.
audience is set to use api/v2. I know this is necessary but have been copypasting it through several projects.
responseType same here. I copy paste this from old projects so I figured it's a good default.
scope you need openid for social logins and to be able to fetch user profiles after authentication. Profile and Email too.
You can over-ride these defaults through the params prop of <AuthConfig>. Params are passed through to the Auth0 client so you can pass any param that Auth0.WebAuth accepts.
5. Create the callback page
Auth0 is based on OAuth and requires redirecting your user to Auth0's login form. After login, users are redirected back to your app.
Any way of creating React pages should work, here's the code for Gatsby:
import * as React from "react"import { useAuth } from "react-use-auth"const Auth0CallbackPage = () = {// this is the important partconst { handleAuthentication } = useAuth()React.useEffect(() => {handleAuthentication()}, [handleAuthentication])// 👆return (<h1>This is the auth callback page,you should be redirected immediately!</h1>)}export default Auth0CallbackPage
The goal is to load a page, briefly show some text, and run the handleAuthentication method from useAuth on page load.
That method creates a cookie in local storage with your user's information and redirects back to homepage. You can pass a postLoginRoute param to redirect to a different page.
Make sure you add <domain>/auth0_callback as a valid callback URL in your Auth0 config.
You can change this URL by passing a custom redirectUri param to <AuthConfig />.
6. Enjoy 😊
You're ready to use useAuth anywhere on your site. Check the API Reference for more detail.
const Login = () => {const { isAuthenticated, login, logout } = useAuth();if (isAuthenticated()) {return <button onClick={logout}>Logout</Button>;} else {return <button onClick={login}>Login</Button>;}};


